Edison LED Lighting

Shop

Projects

How to Choose LED Strip Lights in 2026?

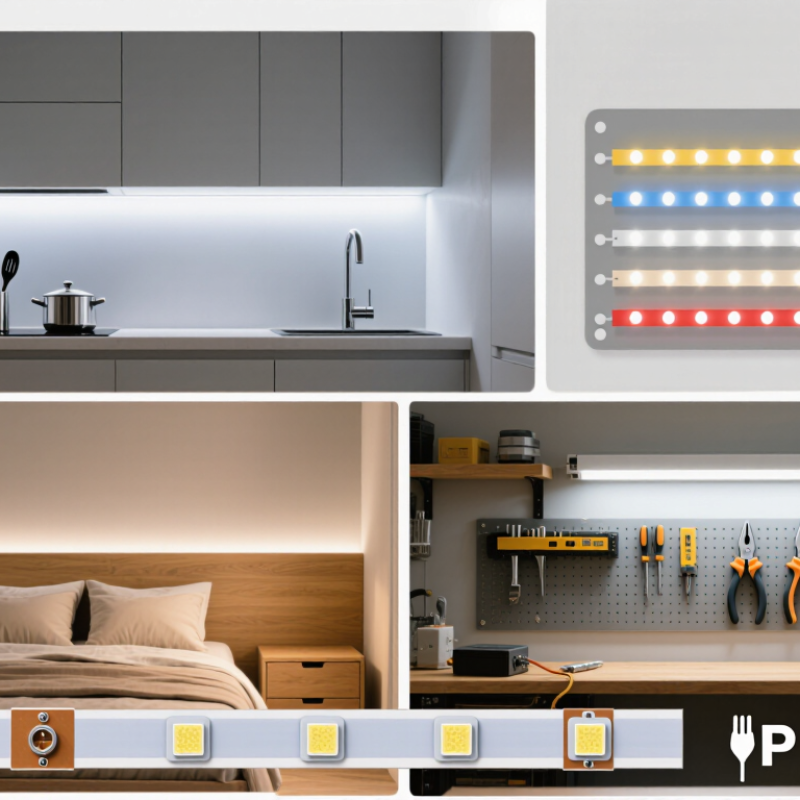
Choosing a Led Strip in 2026 starts with the space, not the color shown in a product photo. A warm white strip can soften a bedroom, while a brighter, cooler option may suit a workbench. Yet color temperature alone tells only part of the story. Check the stated brightness per meter and color-rendering information, especially if the strip will light a kitchen counter or display shelf. Small details matter.

Measure the run carefully. Then check where the strip can be cut, how its connectors fit, and whether the power supply matches its voltage and total load. A long run may look simple on a diagram but produce uneven brightness if the setup is poorly matched. Dimming compatibility matters, too. Not every controller works with every strip. For damp or dusty areas, compare the product’s stated protection rating with the actual conditions; a rating is not a promise of suitability for every installation.

Before buying, compare the full system rather than a strip alone: power supply, controller, connectors, mounting surface, and installation access. Clean, dry surfaces usually help adhesive-backed strips stay in place, though adhesive can disappoint on textured or warm surfaces. I have seen attractive plans become fussy once corners and cabinet edges enter the picture. That is worth admitting. A little extra measuring can prevent a bright, expensive mistake and help you choose lighting that feels right after the first evening, not just in the listing.
How to Choose LED Strip Lights in 2026?

Define the Purpose, Location, and Layout for Your LED Strip Lights

Before choosing LED strip lights, decide what they need to do. A warm glow beneath kitchen cabinets can help with evening food preparation, while a soft line behind a television can reduce harsh contrast. Start with the job. For display shelves, prioritize even light and a diffuser. For stairs, check where shadows and glare may fall before buying anything.

Then examine the location. Measure the surface, note nearby outlets, and check whether the area gets damp, dusty, or hot. A bathroom or covered outdoor space may need a strip with an appropriate moisture rating; verify the product specifications rather than guessing. Look at the mounting surface, too. Rough paint or greasy tile can weaken adhesive, so clean and dry it carefully. I would measure twice. It feels fussy, but an extra few centimeters can change the whole plan.

Sketch the layout, including corners, gaps, and where the power supply will sit. Keep the strip’s cut marks and connection points accessible, and check the manufacturer’s guidance for maximum run length. Long installations can lose brightness toward the far end, so splitting a run or feeding power at more than one point may be necessary. Corners are rarely as simple as they look. Test a short section in place before fixing the full length; the color may feel colder against your actual walls than it did on a screen.

How to Choose LED Strip Lights in 2026

Start with the purpose, location, and layout. These approximate illuminance ranges can help you plan the light needed on a surface; they are not LED strip output specifications.

Choose task lighting for work surfaces and softer ambient or accent lighting for general areas. Actual illuminance depends on strip brightness, mounting distance, diffuser, and room surfaces. Plan the strip route and power supply before installation.

Compare Brightness, Color, Color Rendering, and Strip Density

How to Choose LED Strip Lights in 2026?

Brightness is more than a number on a product box. Check lumens per metre, then consider where the strip will sit. Under a kitchen cabinet, a brighter output helps illuminate a cutting board. Along a hallway shelf, softer light may feel more comfortable. Dimming matters, too. A strip that looks fine in a shop can feel harsh at home. Test it at night.

Color temperature shapes the room’s mood. Warm white often suits bedrooms and living areas, while cooler white can help workspaces feel clearer. RGB strips create vivid colors, but colored LEDs do not always provide useful white light. For flexible everyday lighting, check whether the strip offers dedicated white LEDs. Small detail. Big difference.

Color rendering describes how faithfully light shows objects’ colors. A CRI of 90 or higher can be useful near food, fabrics, or makeup, though it is not the only measure of quality. Strip density affects appearance: widely spaced LEDs may create dotted reflections on glossy counters, while denser strips look smoother. A diffuser can soften those dots, but it also reduces brightness. There is no perfect choice for every room. Measuring the installation area and viewing a sample in its intended setting can prevent an expensive mismatch. I’d still compare the finished effect, not just the specifications.

Match Voltage, Power Supply, Dimming, and Smart Controls

How to Choose LED Strip Lights in 2026? Match Voltage, Power Supply, Dimming, and Smart Controls

Start with the strip’s rated voltage: a 24-volt strip needs a 24-volt DC power supply. Add the wattage for the full installed length, then choose a supply with about 20% spare capacity. For example, a 5-meter strip drawing 14 watts per meter needs 70 watts; a 84-watt supply provides useful headroom. Long runs can look dimmer at the far end. A 24-volt system draws less current than a 12-volt system at equal power, but may still need power fed from both ends. The U.S. Department of Energy reports that LEDs use at least 75% less energy and last up to 25 times longer than incandescent lighting. That general comparison does not guarantee a particular strip’s quality.

Check that the dimmer supports the strip’s voltage, load, and dimming method, such as PWM. Confirm that smart controllers also match the strip and power supply; wireless compatibility alone does not ensure smooth dimming. Test a short sample before fitting strips beneath cabinets or into a narrow channel. Small differences in color or brightness can stand out there.

Tips: Keep the supply ventilated, and leave room to reach it. Measure twice. If a run flickers or changes brightness, recheck connections and load calculations before blaming the controller.

Choose the Right Strip Type and Protection for the Environment

Choosing an LED strip starts with its surroundings, not its color. For dry bedrooms and display shelves, an unsealed strip is often easier to cut and fit. Kitchens, bathrooms, and covered outdoor areas need better protection. Check the IP rating against the actual exposure: IEC 60529 defines these ingress-protection codes. IP65 means dust-tight protection and resistance to water jets; it does not mean a strip can stay underwater. For damp locations, seal connectors too. A protected strip with an exposed plug is still vulnerable.

Match the strip construction to the job. Flexible SMD strips suit general task lighting, while COB strips create a smoother line with fewer visible dots. Long runs may need 24-volt strips to reduce voltage drop, but verify the manufacturer’s guidance and feed power as specified. Heat matters. Silicone coatings can help block moisture, yet may also hold heat if the strip sits in a tight channel. I would not assume “more sealed” always means “better.” The U.S. Department of Energy reports that LEDs use at least 75% less energy and can last up to 25 times longer than incandescent lighting. That comparison supports efficient lighting choices, but lifespan still depends on temperature, power supply, and installation. Check those details before buying.

Check Compatibility, Safety Certifications, and Long-Term Costs

A good LED strip should fit the space and the electrical setup. Match the strip’s voltage to its power supply, and check that the controller supports its color type, connector, and dimming method. A 24-volt strip connected to a 12-volt supply may not work correctly. Small mismatch, big waste. Also check the power supply’s rated output against the strip’s total wattage, with some headroom.

Safety and lifetime costs deserve equal attention. Look for a recognized safety certification mark on the strip and power supply, and verify that the product is rated for its location, especially near moisture. The U.S. Department of Energy’s Energy Saver guidance says LEDs use at least 75% less energy and can last up to 25 times longer than incandescent lighting. ENERGY STAR’s lighting guidance also reports substantial energy savings for certified LEDs. For a rough cost check, a 50-watt strip used four hours daily consumes about 73 kWh yearly; multiply that by your local electricity rate. This estimate leaves out controller standby power and replacement costs, so it is not the whole picture.

Tips: Measure the run before ordering, and note every corner and connector. Keep the receipt and certification details. A spreadsheet helps, but it will not capture glare, installation hassle, or how the light feels at night. I would compare those things in person when possible.

How to Choose LED Strip Lights in 2026? — Check Compatibility, Safety Certifications, and Long-Term Costs
Selection Check What to Verify Practical Guidance Why It Matters
Voltage compatibility Strip input voltage, power-supply output voltage, and the voltage required by any controller. Match the voltage exactly: a 24 V DC strip needs a 24 V DC supply. Do not connect a low-voltage strip directly to mains power. A voltage mismatch can prevent operation or damage the strip and connected equipment.
Power-supply capacity Strip length multiplied by its rated watts per metre. Example: 10 m at 10 W/m requires 100 W. A common planning allowance is about 20% headroom, or a supply rated for at least 120 W; follow the strip and supply manufacturers’ instructions. A correctly sized supply helps avoid overload and supports reliable operation.
Controller and dimmer Controller type, voltage, channel count, and current rating; confirm the dimmer is compatible with the strip and power supply. Single-colour strips generally need a compatible single-channel controller. RGB and RGBW strips need controllers with matching channel types and wiring. Check polarity and connector pin order. Matching the control system prevents wiring errors and unwanted flicker or control issues.
Run length and voltage drop The manufacturer’s maximum continuous run length and recommended wiring or power-injection method. There is no single maximum run length for all strips. Long runs can show reduced brightness or colour variation; follow the datasheet and use power injection when specified. Planning feeds and cable sizes before installation can improve brightness consistency.
Environment and IP rating The rating of the strip and the assembled installation, including connectors and power connections. IP20 is for dry indoor use. IP65 is dust-tight and protected against water jets; IP67 is dust-tight and protected against temporary immersion under specified test conditions. Check the product documentation for installation limits. A strip’s rating alone does not make unsealed connectors or power supplies suitable for wet locations.
Safety marks and documentation Applicable safety requirements for the country of use, plus the exact model’s listing or compliance documents. In the US and Canada, look for a recognized certification mark such as UL or ETL Listed where applicable, and verify the model or listing details with the issuing organization. In the EU, CE is the manufacturer’s declaration of conformity; RoHS concerns restricted substances and is not a substitute for electrical-safety assessment. Marks and documents help establish whether the product has been assessed for relevant requirements. Requirements vary by market and installation.
Annual electricity cost Rated power, daily operating hours, days used, and local electricity rate. Formula: (watts ÷ 1,000) × hours per day × days per year × electricity rate per kWh. Example: 100 W used 5 hours daily at $0.16/kWh costs about $29.20 per year. Energy use is a recurring cost; compare products at the brightness and schedule you actually need.
Worked energy-cost examples Illustrative calculations using 365 days of use; electricity rates and usage are assumptions, not product-price estimates. 40 W × 4 hours/day at $0.15/kWh: $8.76/year. 100 W × 5 hours/day at $0.16/kWh: $29.20/year. 144 W × 6 hours/day at $0.20/kWh: $63.07/year. Actual cost varies with electricity rates, dimming, usage, and real power consumption.
Long-term ownership cost Purchase price, compatible power supplies and controls, installation, energy, and possible replacement or maintenance. Compare the complete installed system rather than the strip alone. Check the warranty terms and the manufacturer’s conditions for rated life; a rated-life figure is not a guarantee of service life in every installation. A lower upfront price may not mean a lower total cost if components, energy use, or replacement needs differ.
Before buying: Confirm voltage, total load, controller compatibility, installation environment, and locally applicable safety documentation for the exact product model.